Friday, December 20, 2013
Ted Talks. Save the bees-----says it all
What this lady reveals in her ted talk and her closing statement, in my mind........is the solution!
Friday, August 23, 2013
Past Projects
The Thomas Residence | ||||||||
 For our second Strawbale Building in Smeltertown, we built a 1640 sq foot home for some more folks wanting to lower their ”Carbon Footprint”. The home is part of a piece of land that is also home to the Cox / Hvoslef project. It features, a variety of historic buildings that comprise of an old homestead. The home incorporates traditional natural plasters inside and out, an adobe earth troumb wall, in-floor radiant heat, solar domestic hot water, and 3000-Watt Solar Grid Inter tie system. This home also features a passive solar radiant air floor influenced by the work of James kachadorian’s in his book “The Passive Solar House”. For our second Strawbale Building in Smeltertown, we built a 1640 sq foot home for some more folks wanting to lower their ”Carbon Footprint”. The home is part of a piece of land that is also home to the Cox / Hvoslef project. It features, a variety of historic buildings that comprise of an old homestead. The home incorporates traditional natural plasters inside and out, an adobe earth troumb wall, in-floor radiant heat, solar domestic hot water, and 3000-Watt Solar Grid Inter tie system. This home also features a passive solar radiant air floor influenced by the work of James kachadorian’s in his book “The Passive Solar House”.
Built in 2008-2009; The Thomas’s Home has very clean lines. They wanted a modern, European look. To accomplish this we used no trim for baseboard, doors, or ceiling. The result; a nice clean simple finish. This Strawbale home is Energy Star Rated
      | ||||||||
 Merry Cox and Eric Hvoslef’s Residence is an artists home with an artists touch. Definitely the most fun we’ve been able to have to date.! This pad not only has all the amenities that you expect from The Strawbale Cottage But cool touches through out. Such as; The grill of a 57? Chevy pick up with the chrome arrows saying Apache integrated in the main rooms plaster walls. The headlights work too! Tadalakt style shower walls, an old steering wheel incorporated into the truth window among other cool details. Merry Cox and Eric Hvoslef’s Residence is an artists home with an artists touch. Definitely the most fun we’ve been able to have to date.! This pad not only has all the amenities that you expect from The Strawbale Cottage But cool touches through out. Such as; The grill of a 57? Chevy pick up with the chrome arrows saying Apache integrated in the main rooms plaster walls. The headlights work too! Tadalakt style shower walls, an old steering wheel incorporated into the truth window among other cool details.         | ||||||||
Thursday, August 15, 2013
Passive solar water bottle light
Check out this 3rd world invention of the solar tube light!! has potential in any natural home. Will need to replace the water with alcohol or something but still ????
http://www.bbc.co.uk/news/magazine-23536914
http://www.bbc.co.uk/news/magazine-23536914
Alfredo Moser: Bottle light inventor proud to be poor
Thursday, April 18, 2013
Ok, Back to the business of building a tyre and strawbale hybrid.
Ok, Back to the business of building a tyre and strawbale hybrid.
Remember; when a home dreams green it dreams strawbale.
© gvroom

Personally I chose to build a hybrid using Earthship concepts below grade and strawbale above grade. I chose this option for a couple of reasons. One, packing tyres is a hell of a lot of work, and one only needs so much mass for an efficient passive solar home.
I have since built 3 homes using tyres to get above grade. They work great when berming into the earth and honestly are not that bad to pack from the ground to about chest high. After that they get incrementally more labor intensive.
 |
| It is important that you keep your courses on the same level! |
I think tyres make excellent Foundations and stem walls. Unlike concrete which is brittle and therefore inflexible, tyres can move with the earth but because of their width still remain stable. And we all know that the ground is in a constant state of flux.
When collecting tyres it is important to get all the same size. In my case they were R-75-15. You will want to learn what the most common SUV or truck tire is in your area, as they will be the easiest to collect. My county is rural with about 14000 souls and supports 3 tire stores. With that said I was able to collect 300 tires in about 3 weeks. Keep in mind these were all the same size tires. That puts into perspective how many tires we use and exemplifies the importance of finding ways to use this soon to become precious resource, and they make great foundations.
When prepping the ground to use Tyres or REU’s [ rammed earth units ] the same rules apply as to any other footer/foundation. The grade needs to be level and on “undisturbed soil” or packed to 50 psi per engineering specs.
This is usually done with moistening the dirt and tamping with a mechanical tamping device.

My approach to packing tires is to use two people working as a team with one person on opposite sides of the wall. One person shovels and packs while the other pry’s open the rim of the REU with a pick axe. The shoveler first fills the tire and then packs out the inside of the tyre first by hand and then with a small 2 pound sledge hammer. This will fill the tire to nearly the required amount with the least amount of effort.
Note: when the REU [R-75-15] is packed to 10” you have achieved the proper psi per engineering specs of 50 psi. [I have the specs on this and would be happy to share them]. It is also important that you keep each course on the same level. Sooo---always shoot grade and use string lines. We will be discussing more on this as we go.
 |
| jumping Jack Tyre, it's a gas, gas, gas! |
Using between 3 & 400 tyres in a project would take a crew of 6 people about a week to complete. The cost compared to what the same amount of mass in concrete would cost me with labor included.
One reason why REU’s work so well is that the rubber acts both as an insulator but also as a conductor. So as one tyre heats and becomes warmer than the tyres around it the rubber helps to conduct the heat to the surrounding cooler tyre.
 |
| this is about 500 sq. ft. and took a work party of friends a long weekend to accomplish what you see here.Oh! and a lot of beer. |
Here we are on our last course of REU’s. In the background you see a packing team giving their last touch to a tire. Note the small sledge. In the foreground you see rebar poking out of the tires. The rebar is beat vertically down through the tires to tie them all together. To accomplish this I used the same tool that is used for t-posts in fencing. The rebar is then left long to tie into the concrete bond beam.

In this photo we see-----Jubilation!, and for good reason. We are celebrating the successful pour of the bond beam. Now this was no easy feat. First of all our forms left allot to be desired. The beam was formed on top of the tires, as wide as the tires, about 30”, and a foot thick [total overkill I might add], keep in mind that we are at the Way Back Inn and getting a cement truck up there, well that alone is asking a lot, not to mention that on that day I had a crew of two. Anyway, about the bond beam, the purpose of the bond beam is exactly as it is described; to bond the tires together and to create a level surface from which to build off of. Note the rebar sticking out of the bond beam. Those were for stabbing into the first course of straw to tie everything together. This I would later learn is not necessary and would not do this again on my next 7 homes.
 On my future homes where I have used tyres I would have the bond beam engineered to use a minimum amount of concrete. I think we shrunk it down to the size of a typical footer which is 8” thick by 16” wide.
 |
| Kevin is filling the v's with an adobe/cob mix. |

 |
| At this instance be sure to install a good French drain. |
Now one of the laws of thermal dynamics state that when two materials of different temperatures are touching, heat will got to cold and vice versa. So in the case of using mass as a heat sink for your home, unless you don’t mind the earth and or elements drawing the heat stored in your mass down to its temperature, you have to isolate/insolate your mass from these elements. If you do then the mass will maintain a consistent temperature based on the ambient temperature of your home. I highly recommend doing this. It is also important to create a moisture barrier between the earth and your tyre wall/footer/foundation. Condensation will eventually deteriorate the integrity of your wall and will also act as a heat syphon.
A word about Septic Systems
 |
| Zobbe in "The Machine" excavating leach field w/addition excavation in foreground and site level for grade. |
A word about Septic Systems: In my opinion a well built septic is a composting system. The tank captures the solids as well as acting as a grease trap, is periodically pumped and then composted at a municipal sewer site. The effluent then gravity feeds into the leach field where it can then naturally filter itself back into the aquifer. If properly installed and maintained these systems will last well over the 20 year span they are rated for. I like the concept of Composting toilet's, and grey water systems and have personally experimented with humanour and have been responsible for maintaining large volume composting toilets for Summit Huts. These systems require lots of hands on maintenance and when not functioning properly result in handling raw sewage.! Although you may be up for the task the reality can be quite over whelming and is a responsibility not to be taken lightly. As for grey water systems the same hold true, and again, if not properly maintained will result in an anaerobic system that will not be healthy for you or your plants. Plan Wisely, not with idealistic lenses that may or may not be based in reality. Having said all that, I do believe that if we all dealt with our own feces/waste the world would be a better place.
All Building projects begin with infrastructure.
Now for the Tyre and Strawbale addition!
 Note the large overhanging eves. A must for passive solar and Strawbale {helps keep the water away} Like us a good home likes a good hat on it's head.
The “addition” is built with an insulated Tyre foundation and stem wall to get me above grade and post and beam with strawbale in fill above grade. It has a clearstory roof for light and passive solar. Though I could not get true south facing exposure {due to geologic obstacles} it is built with passive solar principles, ie… solar alignment, proper amount of glazing {10-14% s. facing}, overhanging eve designed to shade in winter and sun in summer, mass, as in; concrete floor and tyre {REU’s per Michael Renalds Earth Ship specs} and a lot of insulation in walls and ceiling {strawbale for walls @ R30 +/_ and R 30 for Ceiling}. Note; it is important to insulate your mass / heat sink from the earth and elements to prevent conduction & therefore retain the comfortable ambient temperature of the interior of the home. I also prefer R50 in the ceiling.I will discuss these principles further in my Strawbale Cottage Blog.
The purpose of the addition was to house the kitchen, and bathrooms. Because we are off grid I wanted a place that would not freeze without the aid of a mechanical heater and take advantage of the abundant energy from the sun. Consequently it has never gone below 46 deg., the pipes have never frozen, and the plants love it.
 |
| Septic Tank Hole. if it caves, your dead! |
All Building projects begin with infrastructure. $10,000.00's of dollars will be invested in things that become buried, never to be seen again until something goes wrong. Plan wisely!
 |
| line from septic tank to leach field |
Infrastructure involves; excavation, sewer, main water trunk lines, electric main, among other things.
In this case, over the years I have dug and buried over 3000' of water line for both the gravity well system, and gravity fed spring.
A Solar powered low flow well pump can typically pump up to 200' vertical feet from the static water line in the well. As our static line is 30 ft below grade that allows us to potentially pump 170' up. In this case we ran a 1/2" line up to a 1500 g buried cistern that is located 80 vertical feet above the cabin. Now, a home needs to function on a min. of about 30-35 psi and up to 65 psi. In a gravity feed situation your psi is determined by dividing the vertical drop from the water source by 2.3----. Since our drop was 80' divided by 2.3 that gives us a psi at the faucet of approximately 35 psi. and our shower, toilet, faucets, filtration system, all function fine with that pressure, thus eliminating the need of a power eating pressure tank for the home. Important in an off grid situation if you have the elevation to work with.
Our spring functions in much the same way! At the source we have a 2 foot dia. by 4' in length perforated culvert buried vertically in the ground. The perforated section is in the top two feet with no perforations in the bottom 2 feet. This allows water to seep in through the perforations and then the bottom 2 ft. act as a sediment catch. At 2 feet down is the water outlet. the top of the culvert is then covered with a semi-permanent top with plastic sheeting expanding over the ground in all directions topped with gravel to prevent surface water from infiltrating the spring. since earth ie... gravel, sand, etc.. is the best filter this works quite well for keeping the water potable. For an easily read reference on how to do these sort of systems see: http://shop.realgoods.com/The-Home-Water-Supply-p/80205.htm I Used an earlier version of this book to help me design our system.
 |
| hand dug elec. trench. must be 18" below grade |
The Beginning of a dream or how i cut my teath on natural building
I bought the land May 4th , 1994 but this venture didn’t begin then. No sir. For me it began two years earlier, if not from the time I was born.
 |
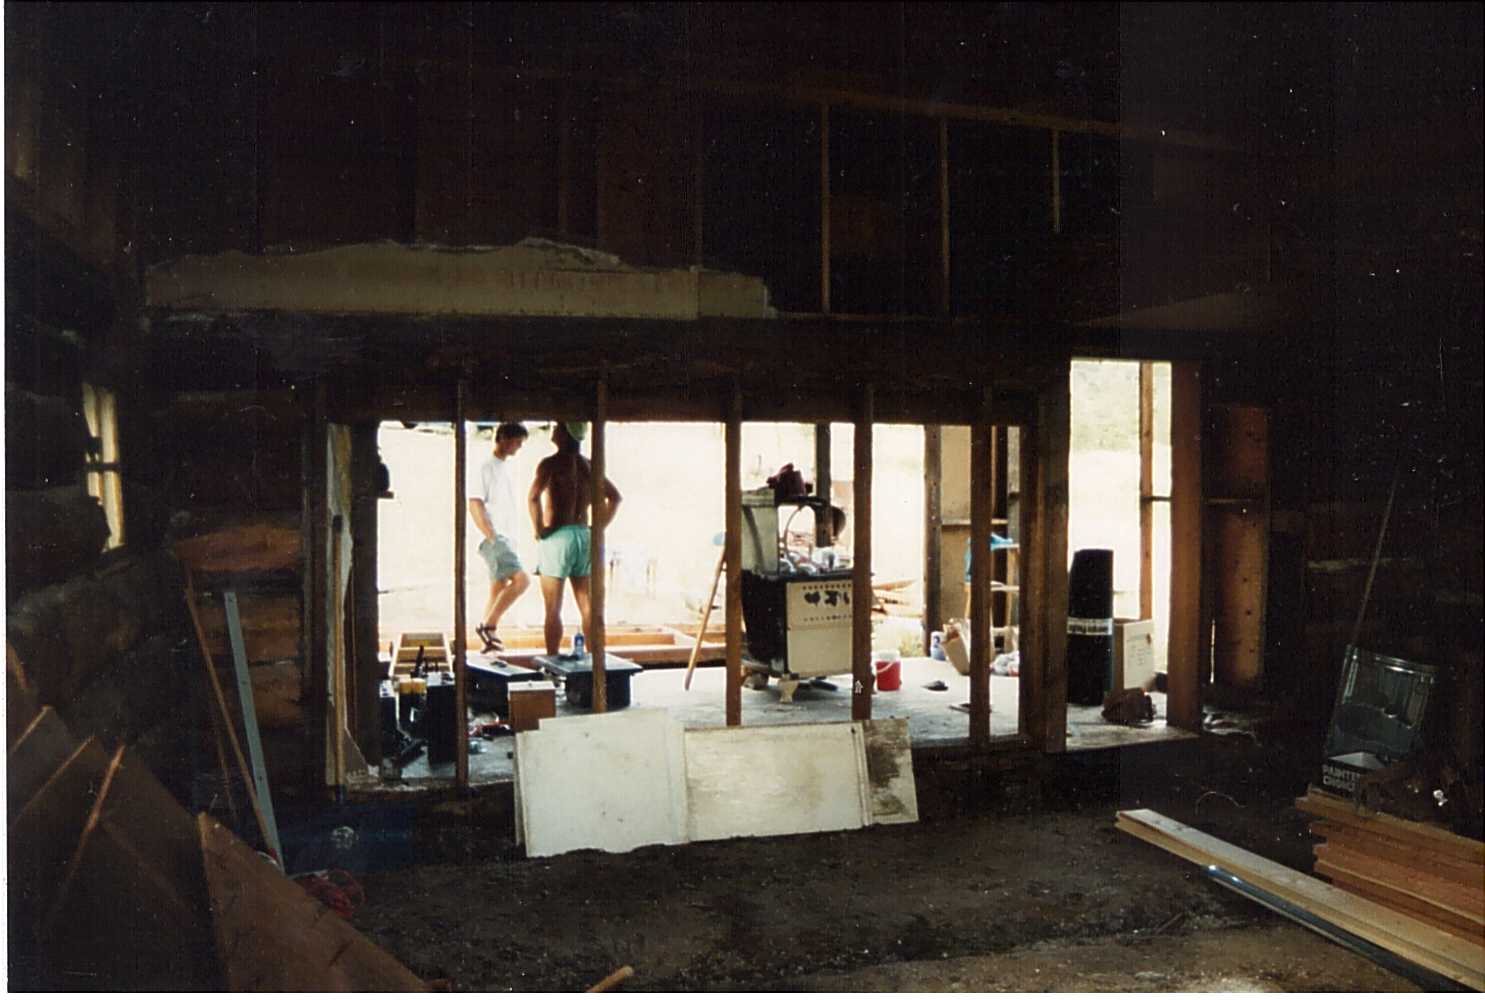
| destruct before construct. this was an ad-on by the previous owner. he poured a concrete floor but built the walls on the ground, therefore they were rotting and had to be torn down and rebuilt on the existing floor. later I would have to put a foundation under it....another chapter. |
Like the sayin goes; how long did it take you to do this? My whole life, or 51 years as of this writing. Some things we were destined to do whether we know it or not. I always wanted to live off the land “sustainably” so to speak so I started out back in 92 or so looking for land from New Mexico to Idaho. This is the first place I saw. Nothing else compared, Seriously. I saw the potential but had no understanding of the can o’ worms I was openin, ahh, through the lens of youth and idealism. Oh well. Never afraid of learnin something new, nothing left to do but point em down hill and let er rip. Pick your line and shred it so to speak. Well here we go-----19 years later! Talk about shreddin some vert.
 |
| this was the original rock fireplace. note where the rocks end. that was the original height of the cabin before the previous owner punched out the roof. the fireplace had to go because a]it was to big for the space and b] all the chinking had failed and a family of rats were livin in the cracks. |


 As you can see in this photo, though not as well as I’d like, that the chinking like everything else was in bad shape or non-existent and In fact had not been done since 1907. We know this because newspapers were used to fill in the gaps between the logs and were from Portland Maine dated 1907. When re-chinking I had found a recipe in the Complete Book Of Cordwood Masonry House building: The Earthwood Method by Rob Roy (Jun 30, 1992) .The recipe consisted of a typical masonry mix of sand, lime, Portland cement, but with the added ingredient of sawdust soaked in water and added to the mix. The mix was just right when you could make a snowball, throw it in the air, and upon landing only slumped a little bit but still held together. The sawdust helped with elasticity, and slowed the drying which improved the curing. After 19 years it is still holding strong! I would recommend this recipe!
 |
| Note the orbs. This is a truly spiritual place. |
The Rock Wall you see here is of native stone and was built by my friend Mike “the skunk slayer” whom was a rock mason in Breckenridge before becoming head of Summit Huts. This is a free standing wall that separates the living room from the bedroom, is 18” thick, has shelves, crystals, antlers for coat racks built into the masonry. The main purpose of the wall was to act as a heat sink absorbing heat from the ambient temperature of the cabin, as well as to absorb heat from the wood stove. Though not a tromb wall it performs perfectly. Although like all mass, especially uninsulated it swings both ways. Ie.. it helps keep the place warm when the place is kept warm but also takes a while to heat up if it hasn’t been kept up, with warmth that is.
The rock used in this wall as well as our stem wall to substitute the bottom course of logs was selected for its near perfect brick shapes. In other words all the surfaces were flat and fairly square or rectangle.
 |
| My Wife Terri. Master Plasterer, and Painter! |
The interior of the cabin has earth plaster details where conventional building materials meet natural ones. The dry wall is painted with Bioshield Matt white natural paint {for both primer and finish paint} and then pigmented with Concrete mineral pigments. {A much cheaper alternative to buying pigment from bio-shield} I purchase these pigments from any concrete batch plant, or from Blue Concrete. I choose this paint because it is truly odorless and economical.
 |
| finished! |
 |
| all the finish details are recycled or reused from previous job sites or salvage yards. |
Though the historic cabin part of the Way Back Inn is far from a well built passive solar home it functions perfectly well. What would I have done differently? Without changing the historical nature and feel of the cabin I would have insulated under the concrete slab as heat goes to cold and the earth will forever drink whatever heat you feed it. In the future I may consider plastering the exterior logs with adobe and a lime top coat to better insulate the logs and seal air infiltration between them. Then the logs would act more as an heat sink and less as a conductor of heat.
 At some point we had to pull a permit for the rehab we were doing to the cabin. The cabin actually sits on a rock outcropping and although the walls of the bedroom were on a concrete slab by the previous owner I still needed to put a foundation under it. So here is my friend Kevin helping me hand dig for the foundation
  |
| another successful back country pour. |

Because of the elevation in relationship to the addition I would have a drainage problem. To remedy this I flashed with metal the first 24" of the bedroom walls.
Note the evidence of 2" blue board at the foundation level and the over lapping flashing for drainage and water protection.


I had to do the same to
the foyer on the west side of the cabin

This is before I had learned about Natural Plasters.
Subscribe to:
Posts (Atom)